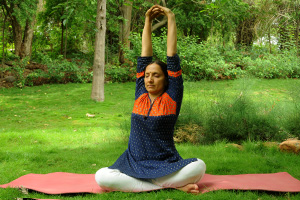
Lengthening The Spine

Breathing in, slowly lift your arms up from the sides.
Interlace your fingers so that the thumbs touch each other gently.
Stretch up as much as you comfortably can. Keep your elbows straight and ensure that your biceps touch your ears.
Hold this posture for 2-3 long deep breaths.
Twisting The Spine To Right and Left
Your fingers continue to remain interlaced above your head.
Breathing out, gently twist to the right side. Hold this position for 2-3 long breaths.
Inhale, come back to the center.
Exhale, turn to your left side and again hold this position for 2-3 long breaths.
Inhale and return to the center.
Bending The Spine Right and Left
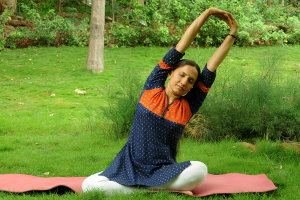
Your fingers continue to remain interlaced above your head.
Exhale and slightly bend to the right side. Hold and keep breathing.
Breathe in and come back to the center.
Exhale and bend a little to the left side. Ensure that you are not bending to the front or back, and that one hand is not stretched more than the other.
Breathing in, come back to the center.
Bending The Spine Forward and Backward

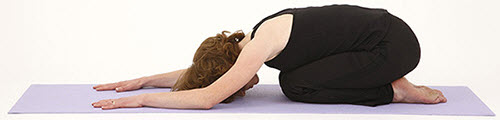
Breathing out, stretch your hands out to the front.
Breathe in and as you now breathe out, stretch forward from your lower back.
Breathe in and as you exhale, turn to your right side. Ensure that both the hands are parallel to each other and stretched equally, else gently correct the posture.
Yoga stretches for Back pain
Breathing in, return to the center.
Exhale and repeat the stretch, turning to the left.
Return to the center as you breathe in, and slowly bring your arms up.
Unlock the fingers and stretch back.
Inhale and come back to the center. As you exhale, slowly bring your arms down from the sides.
Twisting The Spine From Side-to-Side

Keep your left palm on your right knee.
Take a deep breath in and as you exhale, slowly twist to your right side. You may keep the right hand on the floor beside your right hip.
Stretch upward by pressing the right palm on the floor. Do not lean back or forward.
Inhale and return to the center.
Exhale and repeat the stretch on the left side. Keep your right palm on your left knee and left palm on the floor. Remember to keep your back straight and stretch tall.
Breathing in, return to the center.
Change your cross-legged position. If your right leg was placed over the left, now place the left leg over the right and repeat the stretch as explained above to the right and left sides.
 Wind-Relieving pose strengthens the back and abdominal muscles, Enhances blood circulation in the hip joints and eases tension in the lower back